Free Online Ordering for Restaurants with OrderUp
Posted on |
How to accept orders from everywhere online!
Accepting online orders through OrderUp is free and easy. Here’s a step-by-step guide to help you start accepting online orders on your website, Instagram, Facebook page, or blog today!
1. Get your FREE digital menu
The first step in being able to accept online orders is to digitize your menu. Simply send us a word doc, PDF or an updated link to your online menu, and we will create an OrderUp version within 48 hours, guaranteed.
Once this is created you’ll receive a unique link to your menu & backend menu builder to make any edits, or add images, change pricing and so on.
Your Menu Link will look something like this: https://menu.orderup.ai/merchant/l9avorbG
2. Add the link to your website & social media.
Once your menu is all set up, all you need to do is add your Menu Link to your website and social media.
Our Customer Success team is happy to help you with this part!
You can learn more about how to add the link to your Instagram and some of the benefits here.
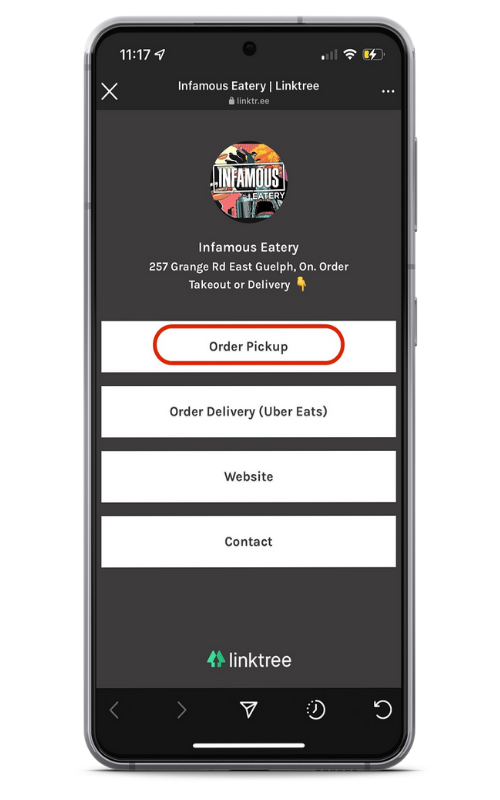
Social Media
Add a linktree to your restaurants Instagram.
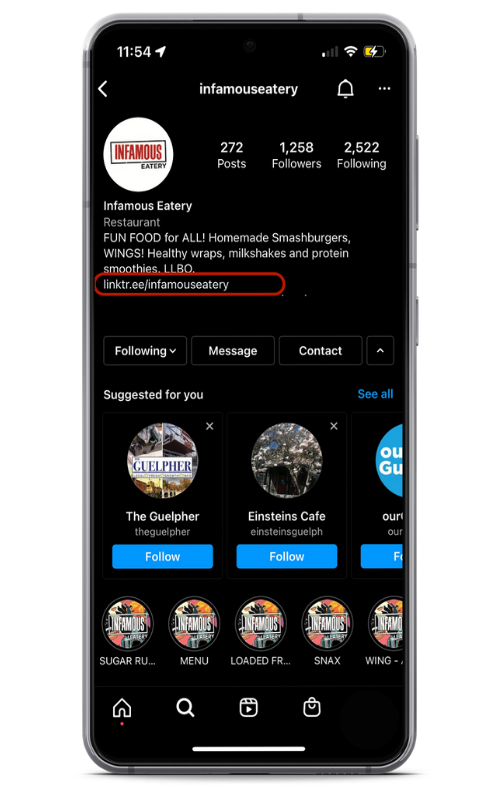
Put your menu link in the Linktree to accepts orders.
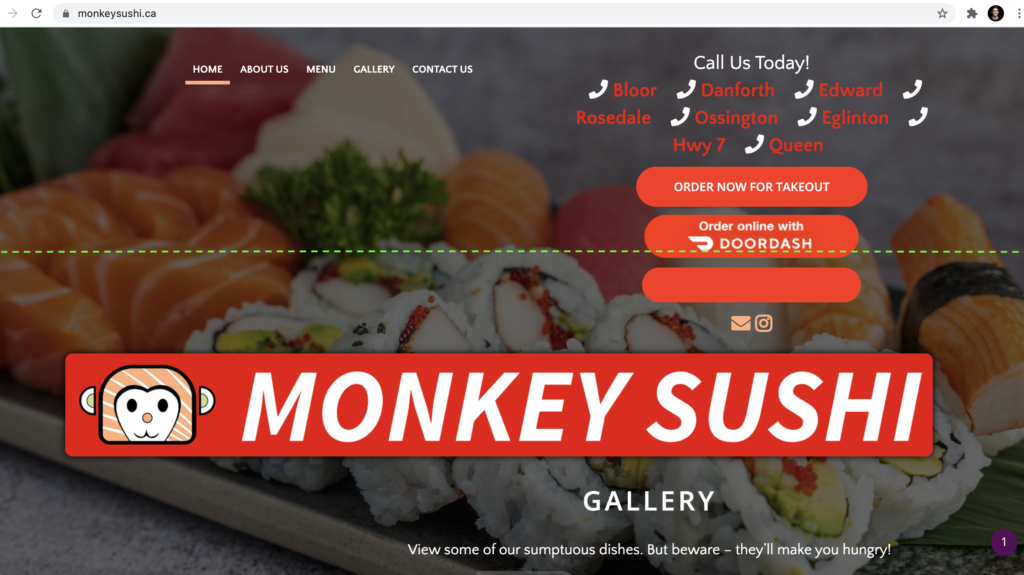
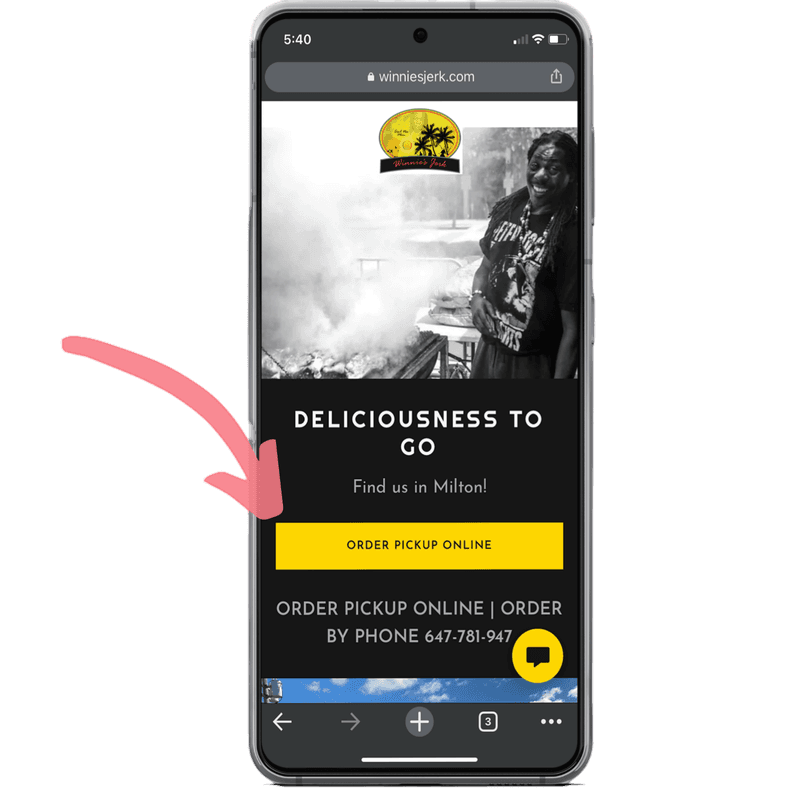
Website
We’re happy to help you update either your Website or Social Media. Please see the examples below of “Order Pickup” buttons or “Order Takeout” buttons on our partners websites.
3. Accepting Orders at Your Restaurant
Accepting orders is a breeze! All you need is a tablet (or laptop) and an internet connection.
Along with your Menu Link, you will also get a Merchant Link. This represents your backend and is the application where orders will appear. All you have to do is put the link in your tablet’s browser, and sign in.
When an order is placed and paid for, it will appear on the tablet KDS (Kitchen Display System) like below. From here, you’ll be able to review & confirm orders, send your guests an ETA for how long an order will take, and even reject or refund items directly if needed. See below for the flow of accepting orders on your tablet.
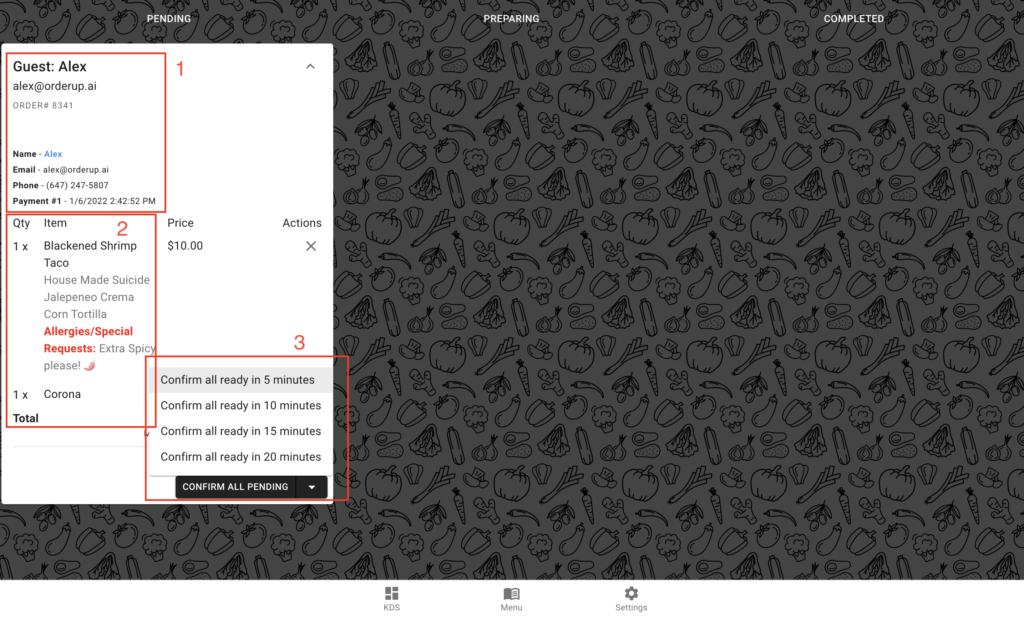
Step 1: Receiving & Confirming an Order
Below represents the screen on your tablet or laptop – the KDS (Kitchen Display System).
Staff will use the KDS to receive, confirm and manage orders.
New Orders will appear in the “Pending” column in a ticket with all the relevant order information.
NOTE: all orders that appear here are already paid for.
- Guest contact info: Name, Email, Phone Number and Time & Date of payment
- Item details: Quantity, Item Name, Modifiers/Add-ons, Allergies/Special Requests.
- NOTE: If you’re not able to accommodate an item, you can remove & refund an item or even just a modifier before confirming the order using the (“X”) button under “Actions”.
- Set ETA for pickup: You’re able to set your own ETA to give the guest an idea of how long it will take. Once confirmed, the guest will be notified by text message (see screenshot in next section) and on the web-app that their order is confirmed. The ticket will then move to the “Preparing” column.
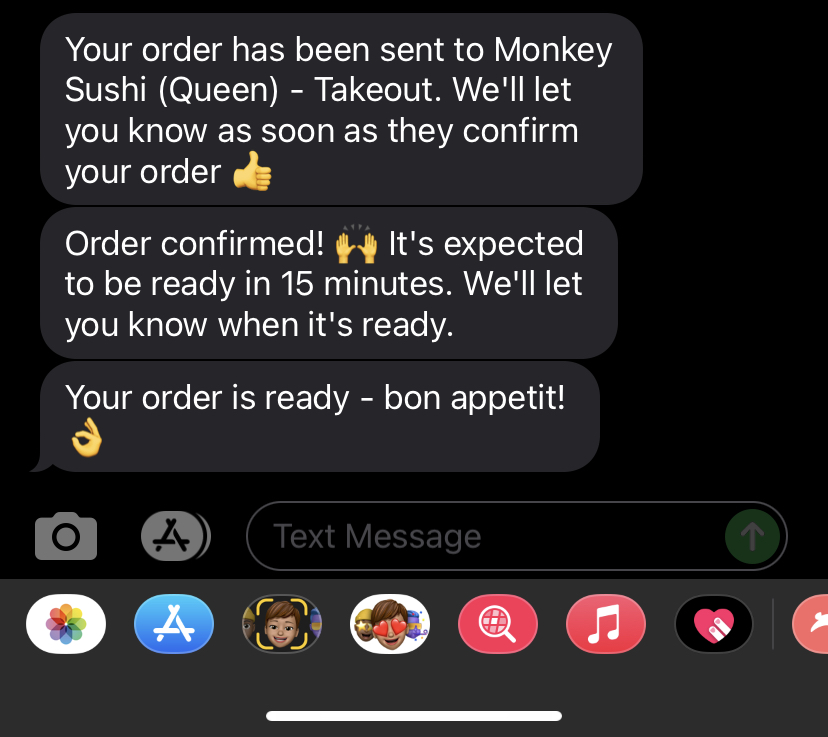
Text Message Notifications
Here’s what a SMS notification stream looks like for guests throughout the ordering & pickup process:
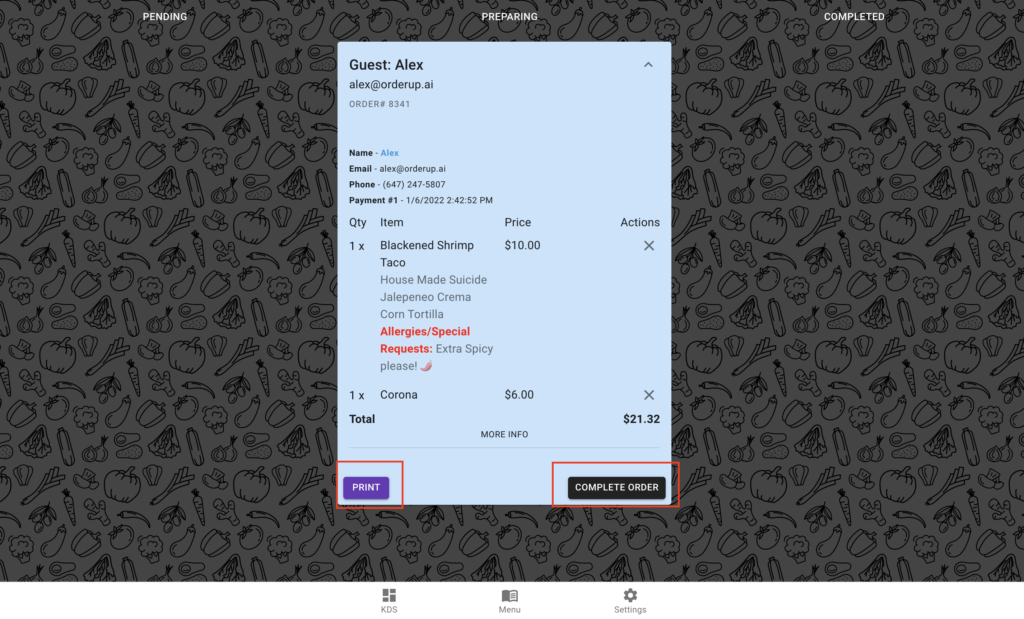
Step 2: Preparing
In this column you can click Print to re-print a chit.
You can Remove & Refund an item or modifier using the (“X”) button under “Actions”.
Once the order is prepared and ready for pickup, click the “Complete Order” button.
This will notify the guest that their order is ready to be picked up. The ticket will now be moved to the Completed column.
Step 3: Completing an Order
- Close Order: Typically, merchants close the order once it is picked up.
- Print: You have the option to print the chit (if you have a printer set up) to go along with it, or to keep for your records.
- Refund All: Let’s say the whole order is incorrect, and Alex isn’t happy. You have the option to refund all.
- Refund Single Item: See the next example for refunding single items or modifiers.
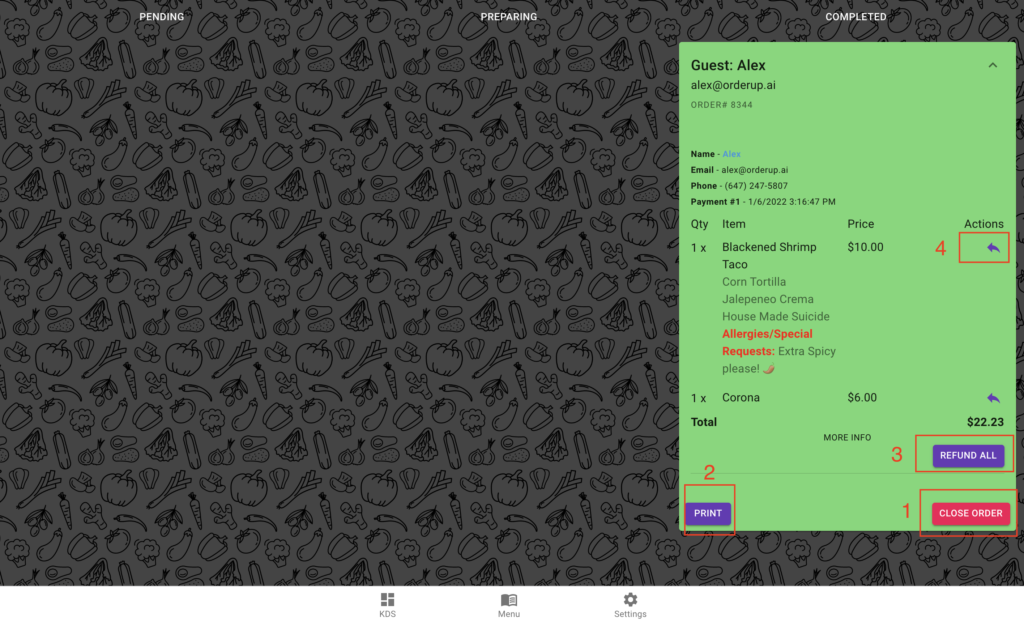
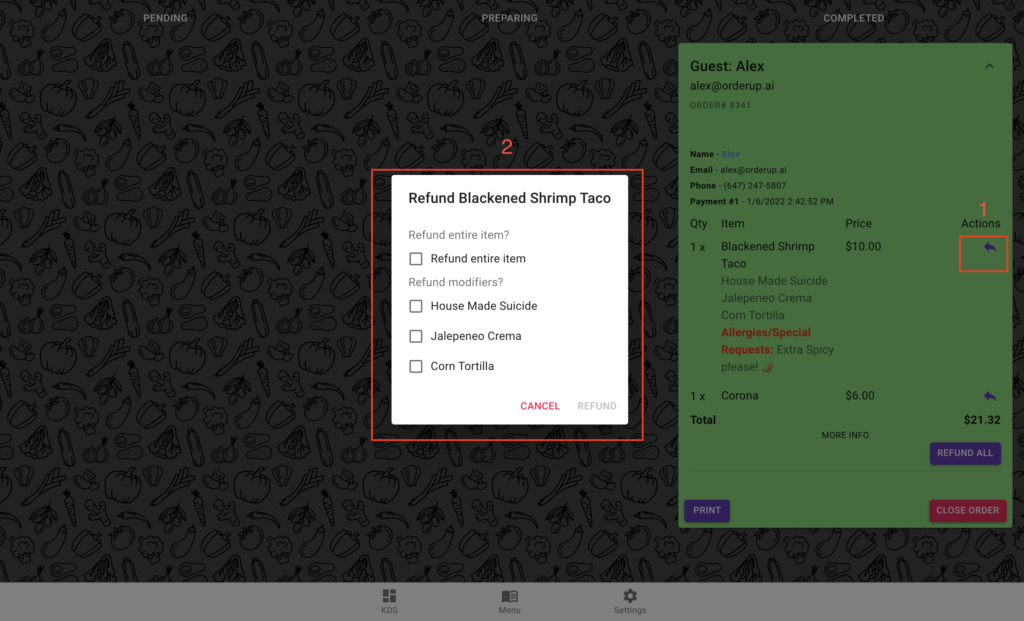
Step 4 (rare): Refunding Single Items or Modifiers
You have the ability to refund single items or specific modifiers to an item.
- Click the purple arrow under “Actions” next to the item.
- This will engage a popup where the entire item, or individual modifiers can be refunded
- You can also remove by item quantity if multiples of the same item has been ordered
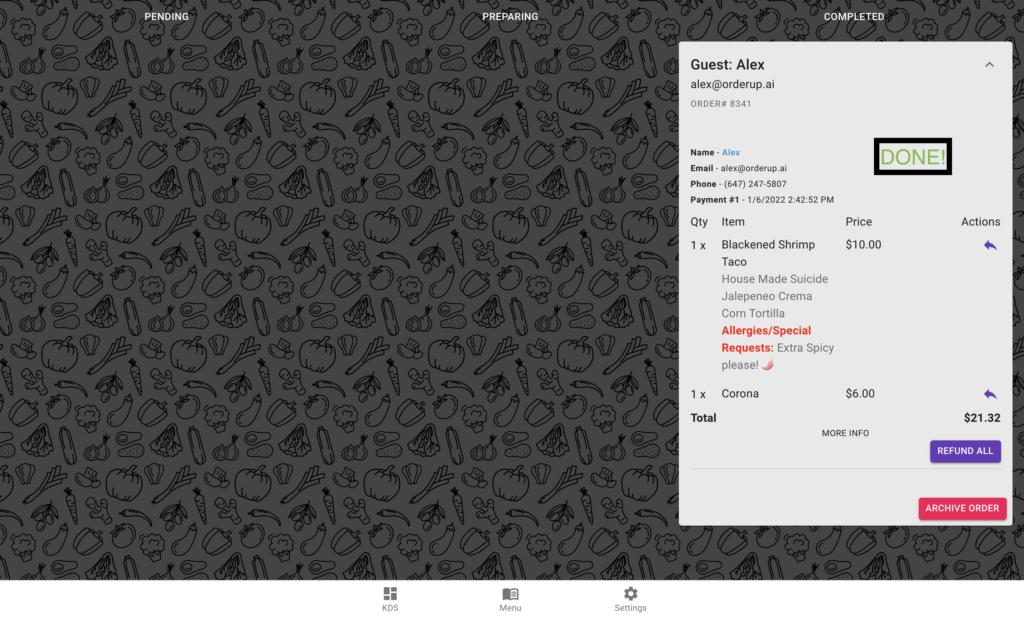
Step 5 : Order Completed!
After the order is picked up, and all is well, click “Close Order”.
This will turn the ticket Grey, showing that it has been picked up. Should there be an issue and the customer calls back with an issue, you are still able to refund from this stage.
Click “Archive Order” to remove from the KDS view.
Free To Use, No Commission Fees
Getting set up with OrderUp for online ordering is easy, and best of all it’s completely FREE.
No monthly fees. No commission fees.
Get set up in less than 48 hours!